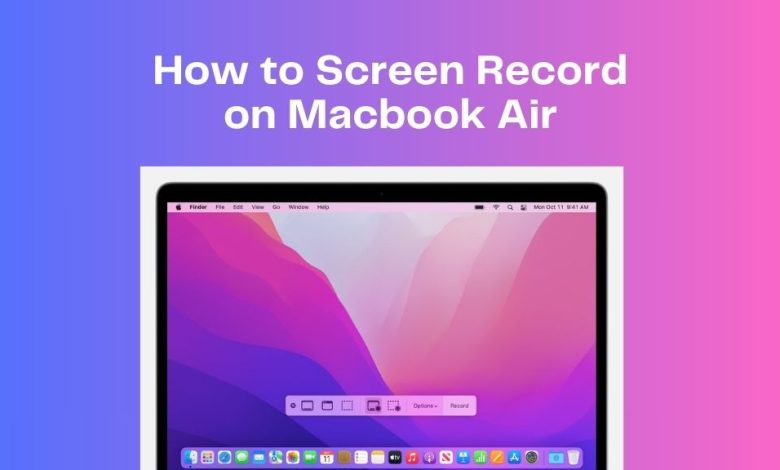
How to Screen Record on Macbook Air – Simple Way
Are you looking for a simple way to screen record on your Macbook Air? Screen recording is one of the most useful tools available to many different kinds of people. Whether you need it for making instructional video tutorials for work, capturing some footage from an online game session with friends, or just wanting to hold onto memories captured from your own device’s display – having the ability to screen record can make life easier and more efficient. Fortunately enough, Apple Inc., have made their products easy-to-use even when executing complex tasks such as this! In this blog post we will cover how to easily go about screen recording on your Macbook Air with a few quick steps.
Introduce the Screen Recording Feature in Macbook Air
If you own a MacBook Air, you may have noticed the nifty screen recording feature available on your device. This tool allows you to easily capture and share anything on your screen, whether it’s a tutorial for a friend or a funny reaction to a viral video. To get started, simply open the “QuickTime Player” and select “New Screen Recording.” From there, you can select your audio and video recording options and begin capturing your screen in just a few clicks. With the ability to pause and resume your recording, you can easily edit out any unwanted footage and create a polished, professional final product. Whether you’re a designer, content creator, or simply a curious tech enthusiast, the screen recording feature on your MacBook Air is sure to come in handy.
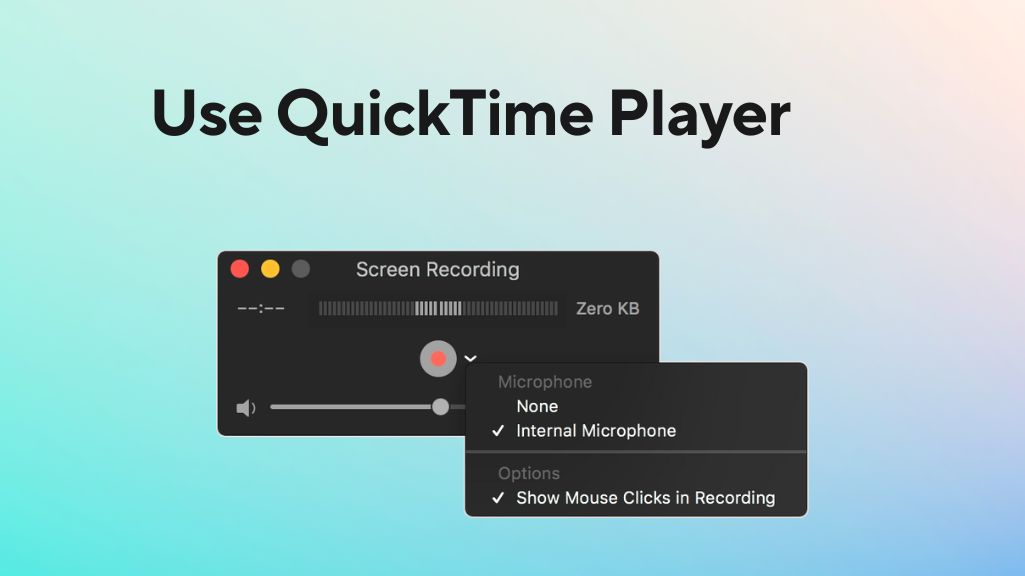
Use QuickTime Player for easy screen recording
QuickTime Player is a built-in tool on your Macbook Air that can make screen recording a breeze. With just a few clicks, you can record your entire screen or a specific portion of it. QuickTime Player even allows you to select which audio input to include in your recording, making it perfect for capturing video tutorials or presentations with accompanying voiceovers. It’s a straightforward and efficient way to record your screen, without the need for any additional software or tools. As an added bonus, QuickTime Player also allows you to easily edit your recordings, giving you complete control over your final product. So next time you need to capture something on your screen, remember to take advantage of this convenient feature on your Macbook Air.

How to Access the Screen Recording Tool
If you’re looking to capture what’s happening on your MacBook Air screen, then you’re in luck! Apple has made it super easy to access the screen recording tool. First, you’ll want to press and hold the “Command” + “Shift” + “5” keys on your keyboard. This will bring up the screen recording toolbar. From there, you can select whether you’d like to record the entire screen or just a specific portion of it. Once you’ve made your selection, simply press the “Record” button and voila! You’re now recording your screen. It’s a great tool for creating tutorials, showing off new software or even just capturing a funny moment to share with your friends. So go ahead and give it a try!


Adjusting Settings Before You Start Your Recording
Before you hit the record button, take a few moments to adjust your settings on your MacBook Air. This can make all the difference in the quality of your screen recording. First, make sure your audio settings are optimized for the type of content you are recording. For example, if you are recording a video with music, you’ll want to make sure your audio input is set to “system audio” instead of “built-in microphone”. Additionally, it’s crucial to check your resolution settings to ensure that your video looks clear and professional. Taking these small steps can elevate your screen recording game and provide a better overall experience for your viewers.
Record Your Screen with Keyboard Shortcuts
Recording your screen on a MacBook Air doesn’t have to be a complicated process. In fact, using simple keyboard shortcuts, you can do it in just a few easy steps. With screen recording, you can easily share your work with others or create helpful tutorials that demonstrate how to use a particular program or app. Best of all, once you know the shortcuts, you’ll be able to record your screen in no time whenever you need to. So whether you’re a student, remote worker, or just someone who enjoys creating content, learning how to screen record on a MacBook Air is definitely a skill worth mastering.
Save Your Recorded File and Share It
Screen recording on a MacBook Air is a powerful tool to help you save and share important information. However, it’s critical to know how to save the recorded file and how to share it with others. Saving the recorded file is easy – just select your preferred format, name your file, and save it to your chosen location. Once saved, you can easily share it with others via email or cloud storage. Don’t let your hard work go to waste – always remember to save and share your recorded file, and you’ll be sure to impress your friends and colleagues with your technical prowess.
Third-party screen recorders
While Macbook Air does offer its own built-in screen recording feature, there are also third-party options available for those who want more advanced features and capabilities. Some popular third-party screen recorders for Macbooks include ScreenFlow, Camtasia, and OBS Studio. These tools offer additional editing options, live streaming capabilities, and even the ability to record from multiple sources simultaneously. So if you are serious about creating high-quality screen recordings, it may be worth exploring these third-party options to see which one best fits your needs and preferences.
Additional Tips for Better Quality Recordings
Are you tired of mediocre screen recordings on your MacBook Air? Luckily, there are ways you can step up your recording game to achieve better quality. One tip is to adjust your screen resolution to a higher quality setting before recording. This will ensure that your footage captures every detail of what’s happening on your screen. Another helpful tip is to monitor your audio levels throughout your recording to avoid any sudden spikes or dips in sound. Additionally, utilizing a high-quality microphone will drastically improve the audio clarity in your recordings. By implementing these additional tips, you’ll be able to produce top-notch screen recordings on your MacBook Air.
In conclusion, if you’re a first-time user of the Screen Recording tool on your Macbook Air, you can now confidently record your screen and share it through email or upload it to Google Drive. With its intuitive interface and helpful keyboard shortcuts, you can quickly adjust the settings to best fit your needs for each recording. Additionally, there are some great tips and tricks to keep in mind when making recordings that will help optimize the quality of the output. All of these features make Macbook Air’s Screen Recording feature one of the most powerful tools available for anyone wanting to capture their screen.
FAQS
How do I record my Mac screen with a keyboard?
Recording your Mac screen using keyboard shortcuts is a quick and efficient way to create screen recordings. Follow these steps to record your Mac screen with keyboard shortcuts:
- Press the “Command” + “Shift” + “5” keys on your keyboard to bring up the screen recording toolbar.
- To record the entire screen, press “Command” + “Shift” + “5” and then click on the interface that says “Capture entire screen”.
- To record a specific portion of your screen, press “Command” + “Shift” + “5” and then select the desired area by clicking and dragging your cursor.
- Once you’ve selected your recording area, press the spacebar to start recording.
- When you’re finished recording, press the spacebar again to stop and save your recording. The file will automatically be saved to your desktop.
- You can access more advanced options by clicking on the “Options” button on the screen recording toolbar. This allows you to adjust settings such as audio input and timer duration for recordings.
By using keyboard shortcuts, you can easily record your Mac screen.
How do you record on a Mac without an app?
If you don’t want to use a third-party app, there is a built-in screen recording feature on Mac called QuickTime Player that you can use to record your screen. Here’s how:
- Open QuickTime Player from the Applications folder.
- In the menu bar, click on “File” and then select “New Screen Recording.”
- A small screen recording window will appear. Click on the arrow next to the record button to adjust settings such as audio and quality.
- Click on the red record button when you’re ready to start recording.
- To stop and save your recording, click on the stop button in the menu bar or press “Command” + “Control” + “Esc” on your keyboard.
Why is there no sound when I screen record on a Mac?
If there is no sound when you screen record on a Mac, it could be due to several reasons. Here are some troubleshooting steps you can try:
- Check your audio settings: Make sure that the correct input source is selected for audio recording. You can do this by clicking on the volume icon in the menu bar and selecting “Sound Preferences.” Under the “Input” tab, select the correct microphone or audio input device.
- Check your recording settings: When using the built-in screen recording feature on Mac, make sure that the “Microphone Audio” option is enabled in QuickTime Player’s recording menu.
- Make sure your microphone is not muted: If you are using an external microphone, make sure it is not muted or turned off.
- Restart your computer: Sometimes, simply restarting your computer can solve audio issues.
- Update your software: Make sure you have the latest software updates installed on your Mac.
If none of these solutions work, there may be an issue with your microphone or audio settings on your device. It’s always a good idea to check these settings before recording to ensure.